

Setting up your dressage arena!
Posted by SUZANNE SHERBUNDY

How to set up a dressage arena!
Weather you are new to the sport of dressage or been at it for a while, the importance of geometric accuracy when riding a test, or simply correctly schooling a horse is essential. When riding a test, regardless how fancy or well your horse is going, points can be lost with bad geometry. More so, you are giving away points by making a 20-meter circle that is shaped like a catawampus egg or a three-loop serpentine that has loops of a variety of sizes. However, before you can ride accurate figures you must have an accurately sized ring in which to ride said figures. Many of us have tried to eyeball a ring setting up long and short sides with a variety of poles and cones but often, we get to riding in it, quickly realizing that our eyeballs did not do such a good job sizing the arena. So…it becomes obvious that if you want to ride an accurate test with accurate figures you will need an accurately sized ring in which to ride. Well, this can’t be that difficult, 60 meters x 20 meters sounds simple enough…right? Hmmm…I hope you remember the Pythagorean Theorem – this is when you get to use math in real life, if you can call the horse world real life. So here goes, first we will outline a list of supplies and then take a step-by-step process for measuring out a perfectly sized arena.

These are some essential tools that are needed to make this process work:
- 2x 100 meter metric tape measures, if you have three, the process is a bit easier
- 8 metal stakes that can firmly be driven into the ground
- Mallet to pound stakes into ground
- Means to calculate measurements aka – phone calculator works well
- Arena markers i.e. long side and short side boarder (Burlingham arenas are ideal for this)
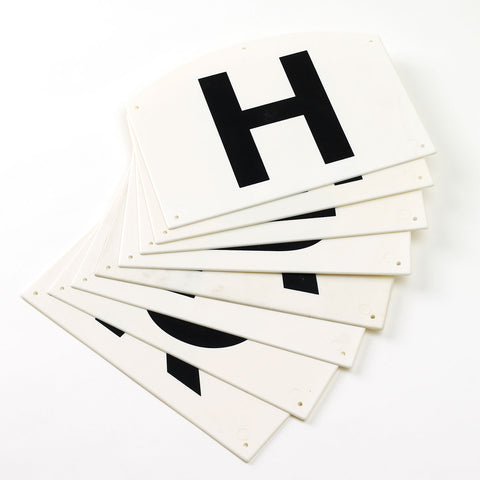
- Dressage letters
- Cheat sheet for arena measurements and where the letters go – there are many mnemonics that can be made to help remember the dressage arena letter order.
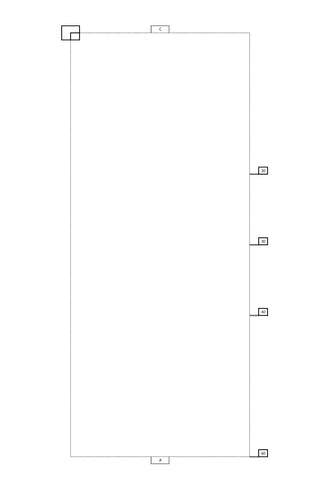
Once you have your supplies together you can begin the process. A note on the whole “metric” thing before we get started. The US is one of a small handful of countries that still have an attachment to the Imperial System of measurement. Even the UK (the original Imperial) has begun to embrace the metric system (at least a little bit). Since we are in the states and the Imperial System is SOP make sure your tape measure is in Metric (at least one side of it) and you are using the Metric side of the tape measure. It goes without saying that yes, you absolutely can convert Metric measurements to Imperial, and I will make those notes at the end. However, to avoid confusion all measurements (unless otherwise noted) will be in Metric. Now, time to measure. Below is a visual and written guide for measuring your arena. Measurements are for a 60M ring and can be adjusted accordingly if a 40M ring is preferred. Tablets are wonderful and I often find myself drawing out test patterns on my tablet to help learn tests. Below are some screenshots of an arena with measurement notes to help the set up process in additional to the step by step written directions.
The Set-Up Process


- Ensure the area in which you want to set up your dressage ring is large enough to hold your desired arena size. More so, roughly measure the entire area to be 20M< wide and 60M< long.
- Determine where you would like the “C” short side of your arena. This is the only time you are allowed to “eye ball” anything. Set your first stake in the ground, establishing the first corner of your arena. This will be known as “Stake #1)
- Measure out 20M straight placing your second stake at the 20M mark. This will be known as “Stake #2. Stake #1 to Stake #2 makes your first short side with “C” being placed at the 10M mark.
- Place the end of one of your tape measures on Stake #1 and place the end of the second tape measure on Stake #2.
- Pull the tape measure attached to Stake #2 perpendicular to the stake.
- Pull the tape measure attached to Stake #1 diagonally toward the 20M mark on the other tape measure.
- The diagonal tape measure, at 28.28M from Stake #1 should meet the perpendicular tape measure from stake #2 at 20M at which stake #3 should be placed and the first point on the long side established.
- In a similar fashion the long side tape measure extending from stake #2 should be extended to 30M meeting the diagonal tape measure from Stake #1 at 36.06M. A fourth stake should be added at this point making the second long side point.
- Again, extend the long side tape measure to 40M and the diagonal tape measure to 44.72M. Place a fifth stake at the point at which they meet; this is the third point on the long side.
- Again, extend the long side tape measure to 60M and the diagonal tape measure to 63.25M. Place a sixth stake at the point at which they meet; this is the fourth point on the long side. In addition, this marks the 60M point and end of the long side.
- Repeat the same measuring process on the opposite long side.
- Once you have the second long side measured your arena is complete. Perimeter markers such as the Burlingham Dressage Arena can be set along your newly measured dressage arena finishing off with a complete set of dressage arena letters.
- Letter placement for the large 60M ring are as follows: A and C are at the 10M mark on the short side (half way or middle point of short side), the corner letters H,M,K,F are 6M from the corner points down the long side, all other long side letters are 12M apart (H-S, S-E, E-V, V-K, F-P, P-B, B-R, R-M).
The Paddock Saddlery has a great selection of arena parameters and letters to help with all of your dressage arena needs, check out the following link for more dressage arena items. https://paddocksaddlery.com/collections/dressage-arenas


Some extra tips and info:
- If you have multiple metric tape measures it will help the process as you can leave one tape measure on each long-side and short side to notate the straight line and help with letter markers. The tape measures also a straight edge to which the arena wall markers can be lined up against.
- If a metric tape measure is unavailable the following will help with conversions: 1meter = 3.28 feet, 60m = 196.85ft, 40m = 131.23ft, 30m = 98.43ftf, 20m = 65.62ft, 28.28m = 92.78ft, 36.06m = 118.31ft, 44.72m = 146.72ft, 63.25m = 207.51ft
- Letters 6m from the corner and 12m apart from one another.
- Pythagorean Theorem: a2 + b2 = c2 a = the length of the short side, b = the length of the long side, c = the length of the diagonal.
- Starting at C and going clockwise around the ring (from the perspective of A) the letters are as follows: C, M, R, B, P, F, A, K, V, E, S, H.
- The all too often forgotten about letters on the centerline (except X): G (between H and M), I (between S and R), X (between E and B), L (between V and P), D (between K and F).
- If placing long side letters beginning from the C end corner, H/M go at the 6m, S/R go at 18m, E/B go at 30m, V/P go at 42m and K/F go at 54m.

